Quickly learn and use Git for your project
A simple tutorial for git to help you fast master basic git command
Nov 11, 2021 by Yan Ding
1. What is git?
Simply speaking, git a command which can help you do version management. For example, if 4 people are working on one project, how can these people cooperate with each other? The answer is Git. One person works on front-end programming and another one works on backend. Both need to update their codes in this project. They can use GitHub to keep updated with each other. Creating a repository in GitHub so they can upload their codes from local to remote.
2. Connect with GitHub
For example, we work in our local machine with Visual Studio Code. How can we connect with a remote GitHub repository? We need to first configure the SSH key in our local machine and GitHub account.
In the local machine, we need to generate SSH keys(a public and a private key). We can use our email "youremail@xxx.com". Open terminal and type:
ssh-keygen -t rsa -b 4096 -C "youremail@xxx.com"
Give the path you want to store the key. For example, we can name the key as testkey and store it in C:\Users\username/.ssh/testkey. There will be 2 keys generated. One is public key (testkey.pub) and another is private (testkey). We don't need to enter the passphrase so just hit enter.
Go to the directory where you just store your key. Open Git Bash, cd to that directory and type:
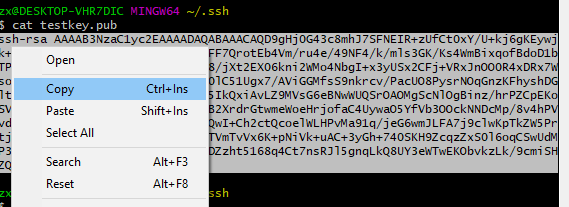
cat testkey.pub
You should can see the public key. Please copy the public key.
-
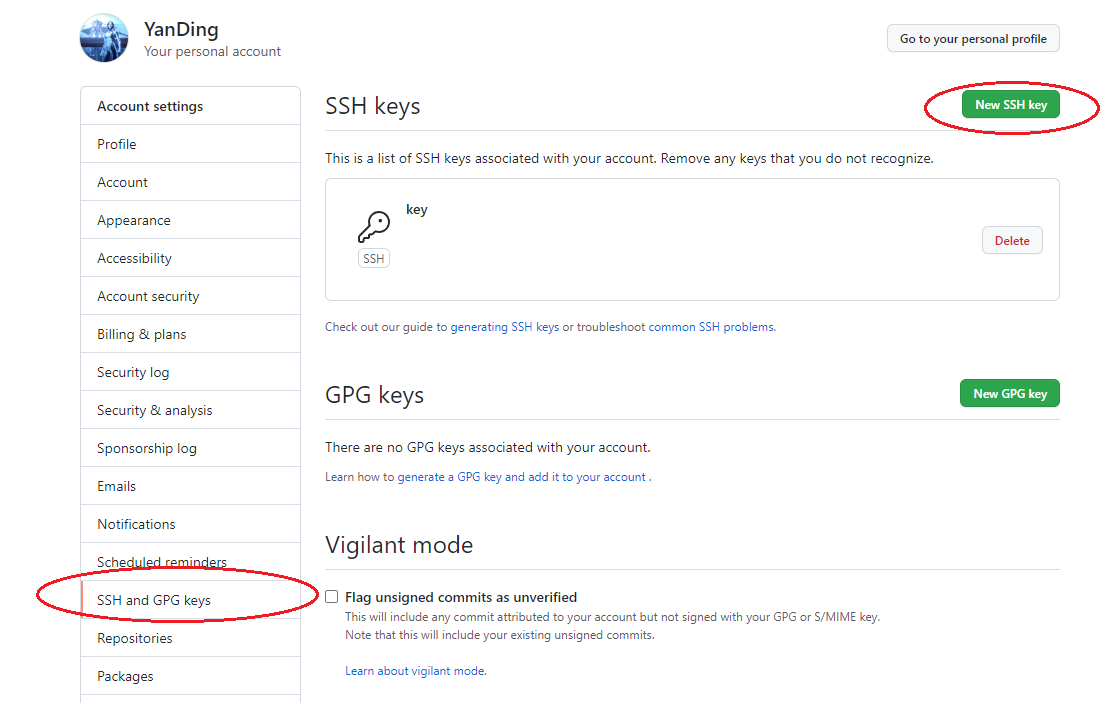
Go to your GitHub account and click settings. Open SSH and GPG keys. Click "New SSH Key" and paste the key there.
We need add key to local machine. Open Git Bash, cd to the directory we store our testkey.
ssh-add -k testkey
Now our local machine can communicate with remote repositories in GitHub. First time you use git in Visual Studio Code, you may need to agree to the connection.
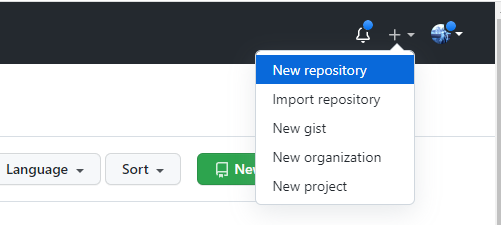
3. Create a new repository in GitHub
Go to our GitHub account and create a new repository named test-demo.
After the repo is created, we can get the url as following:
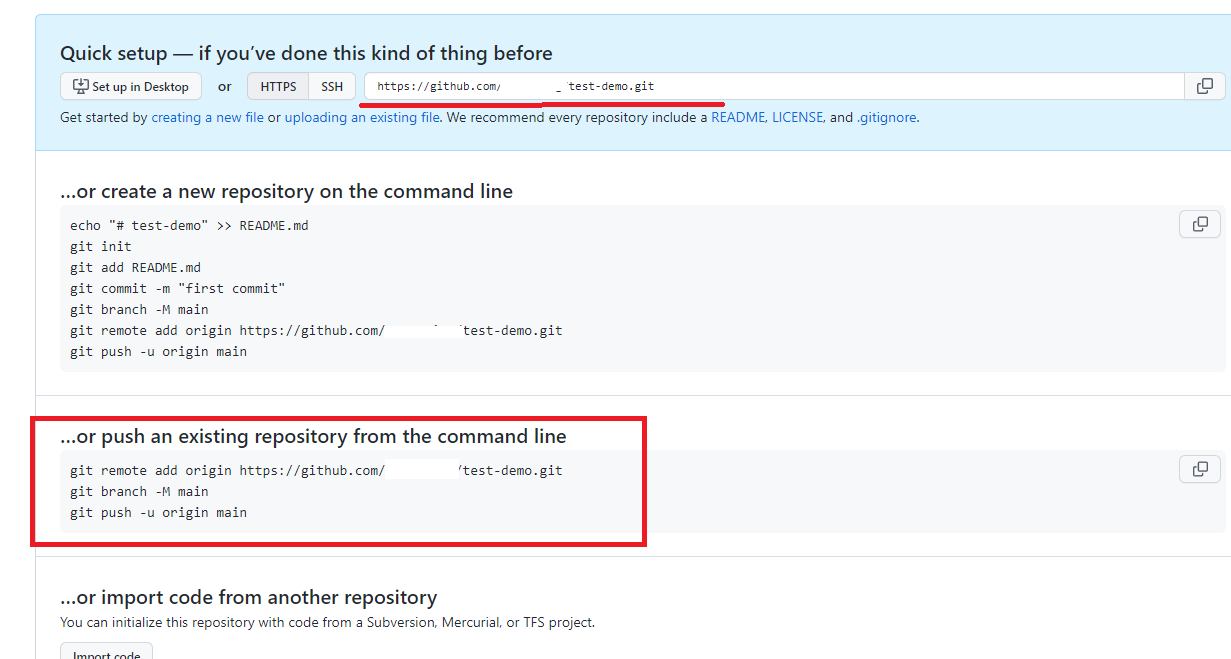
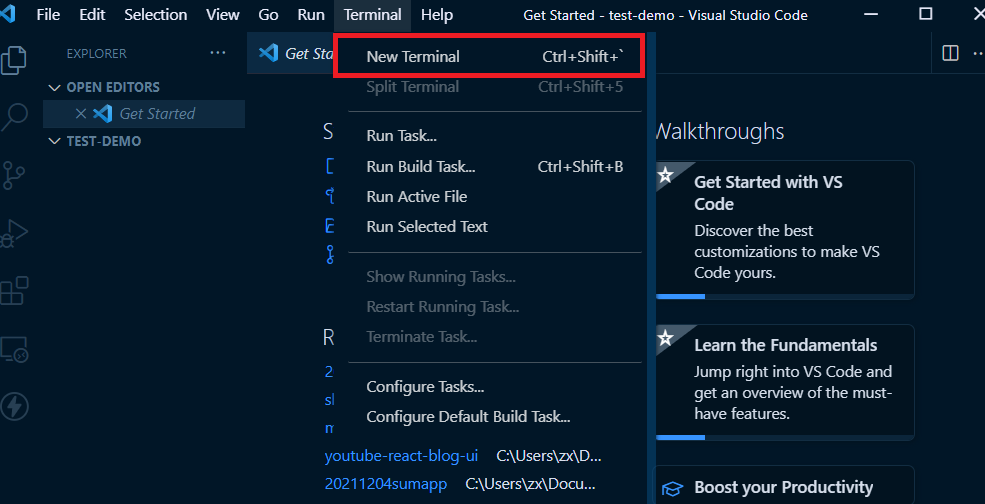
In our local machine, we need to create a folder (e.g. located in C:/Documents/git-tutorial) which we will work in this directory. Open this folder in VS Code and open a new terminal.
Secondly, we need to add this remote repo to our local machine. We can follow the instructions from GitHub. We type git remote command in terminal:
git init
git remote add origin https://github.com/yourGitHubName/test-demo.git
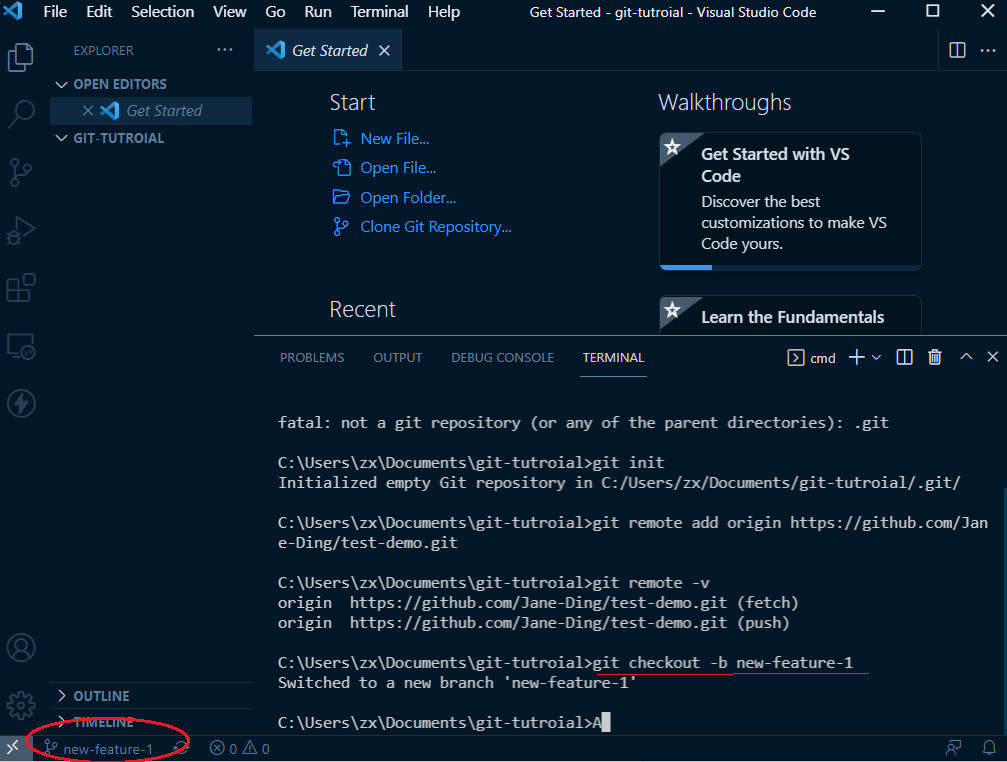
We can check whether this remote repo is working well:
git remote -v
If it is working well, you should see the url of your repo.
-
Thirdly, we can create a new branch named “new-feature-1” locally and push it to remote. It is recommended to create a new branch rather than directly change the master branch. Other developer may need to review your code first and then merge it to master.
git checkout -b new-feaure-1
Now we can update our code in this branch. For example, we can add a README.md
-
After we update the code, we need to push this branch to remote. We can do following:
git add .
(Git add means updating new changes such as new files, modifying codes, etc.)
git commit -m "add readme"(Git commit means save the changes. -m “description” need be given when do git commit)
git push -u origin new-feature-1
(Git push means uploading local changes to remote repo)
-
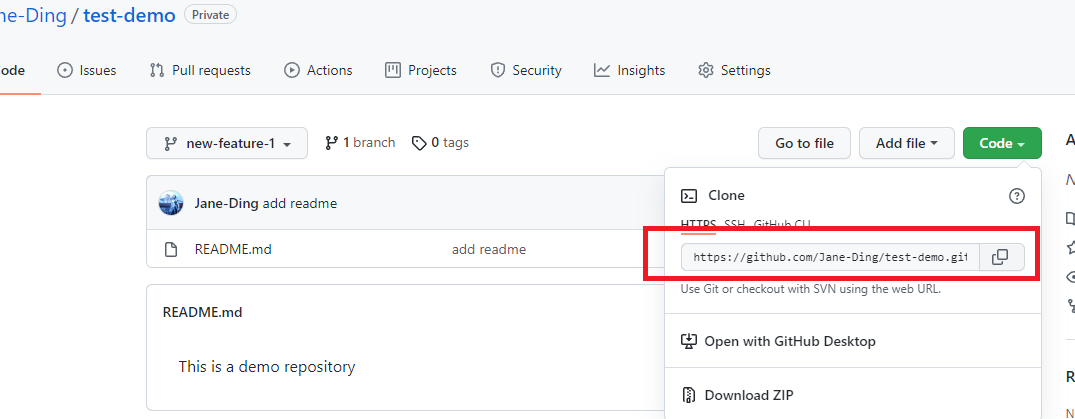
Go back to our GitHub repo, we will can see the new branch named “new-feature-1”.
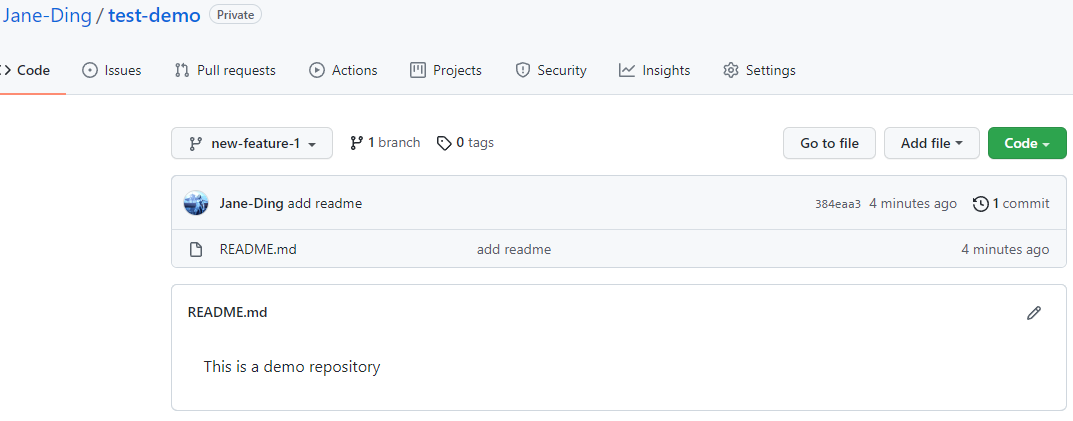
Great! We can now create a new branch and do some changes and push to remote. So other people can see our new work in the project.
4. Clone, fetch, pull other people's work from GitHub
-
git clone … is used to download a repo from remote.
git clone https://…
For example, if you are interested in somebody's repo, you can just download it with git from the url. It is much convenient:
-
git fetch … is used to download a branch which is created by other people. Maybe you need to download his/her changes and review whether it works fine.
git fetch origin feature-1
After download the branch, we need to change to that branch in our local machine.
git checkout feature-1
Please be aware that you should not have this branch locally. If you already have that branch, you will need to use git pull.
-
git pull … = git fetch + git merge. Git pull is used to update the working branch from remote.
git pull origin feature-1
Now we can also track other people's work.
5. Summary
Congrats! In this tutorial, we learned how to update our own work from the local machine to the remote repository. Meanwhile, we also learned how to track other people’s work and downloads or pull to our local working space. So we can work together as a team. Git is a very efficient tool. I hope this article can help you well. If you have any questions, please leave your comments blow. Thank you for reading!